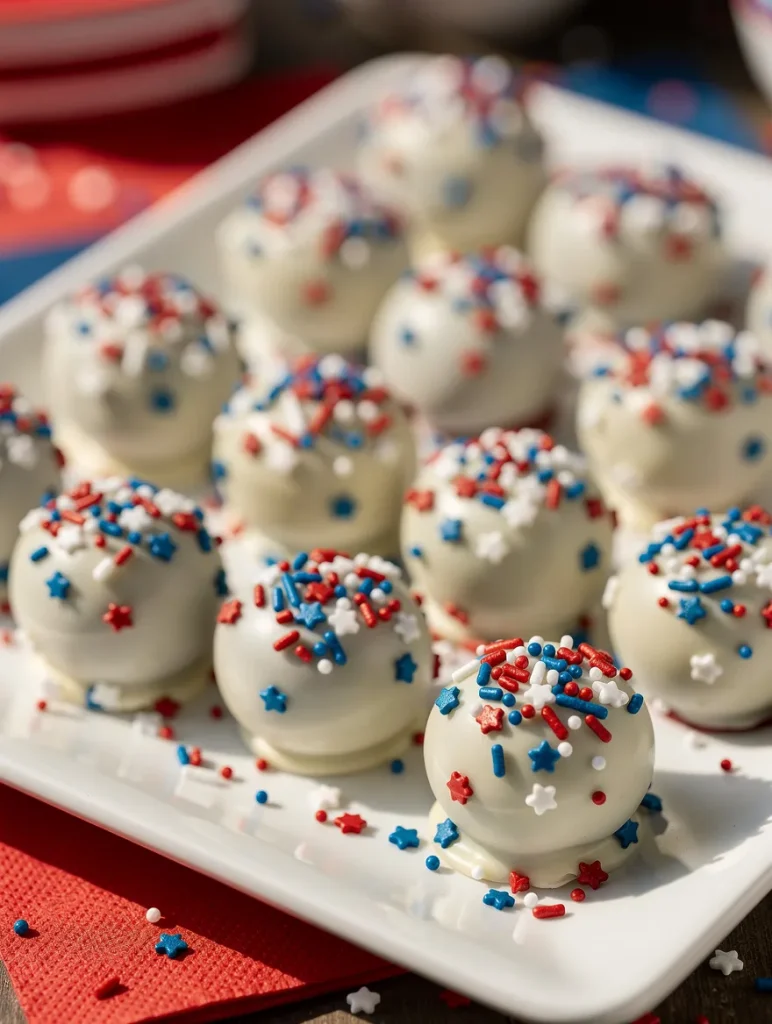
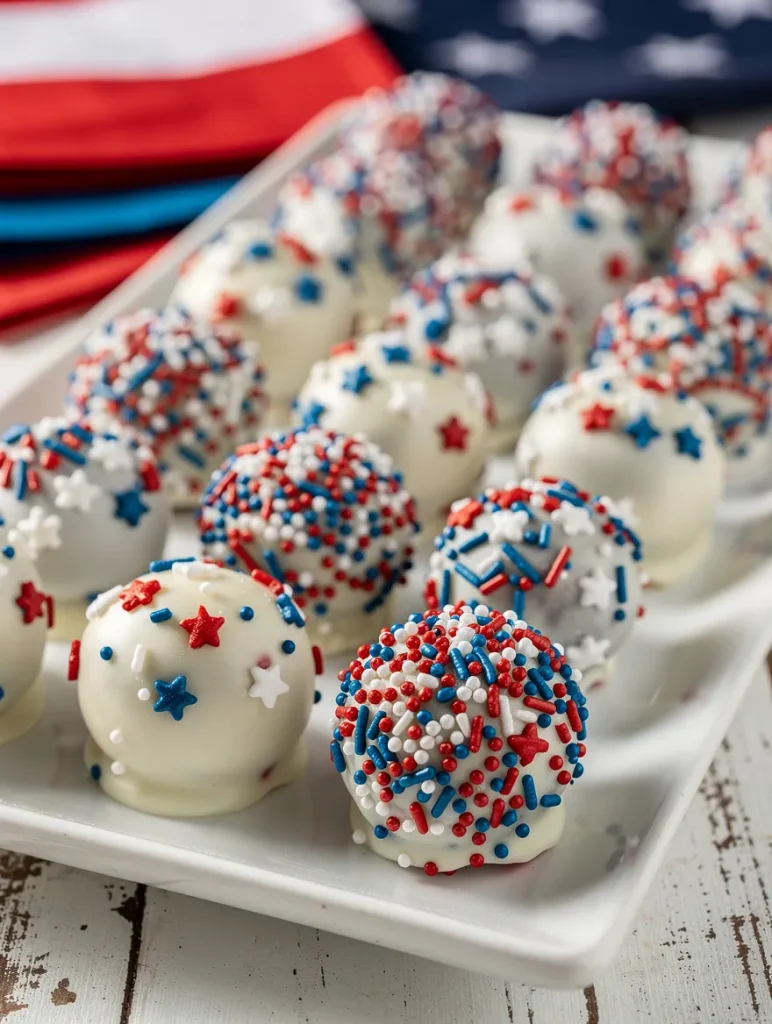
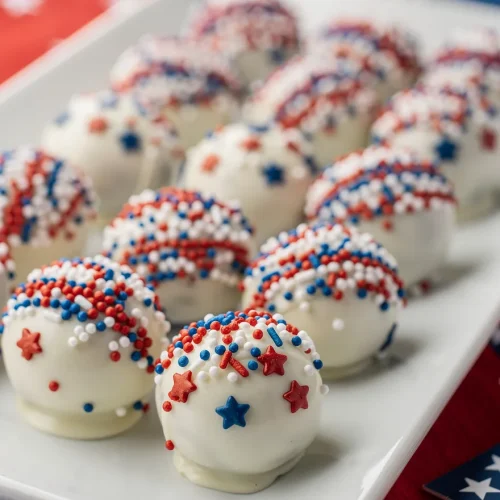
There’s something joyful about tiny, colorful bites that make people smile the moment they see them — and these patriotic Oreo balls do exactly that. Whether you’re getting ready for a cookout, parade, or a last-minute gathering, this recipe gives you a festive dessert that’s as fun to decorate as it is to eat. You don’t need fancy equipment or deep pastry knowledge; just a handful of pantry staples and a little patience while the chocolate sets.
If you’re baking for a crowd and need a hot-out-of-the-oven option, Homemade Chocolate Chip Cookies never disappoint.
Why you’ll love these Oreo balls
They’re buttery, chocolatey, and creamy all at once. The Oreo crumbs mixed with cream cheese form a soft, fudge-like center that holds its shape once dipped. Then, you get to play with red, white, and blue coatings — sprinkles, drizzles, or colored chocolate — to make them delightfully patriotic. I’ll also share a couple of tiny tricks I use to keep the balls smooth and avoid those pesky white streaks in the coating.
If you love Oreo-based desserts, the Red Velvet Oreo Cake is a show-stopping option for larger celebrations.
Ingredients
- 36 regular chocolate sandwich cookies (Oreos or store brand)
- 8 oz (1 cup) cream cheese, softened
- 12 oz white chocolate or candy melts, divided
- Red candy melts or red-colored white chocolate, about 2–3 oz
- Blue candy melts or blue-colored white chocolate, about 2–3 oz
- Assorted patriotic sprinkles (red, white & blue)
- Optional: 1 tsp vanilla extract or a pinch of salt
Equipment
- Food processor or a heavy-duty zip-top bag and rolling pin
- Baking sheet lined with parchment or wax paper
- Microwave-safe bowls or a double boiler
- Toothpicks or dipping fork
How to Make Patriotic Oreo Balls
Time needed: 50 minutes
Read through all the steps before you start — there’s a little chilling time, but most of the hands-on work is straightforward.
- Crush the cookies
Place the sandwich cookies in a food processor and pulse until they’re fine crumbs. If you don’t have a processor, put them in a sturdy zip-top bag and crush with a rolling pin until you have uniform crumbs.
- Mix with cream cheese
Transfer crumbs to a bowl, add the softened cream cheese (and vanilla or pinch of salt if using). Mix with a spatula until a cohesive dough forms. It will be soft but not wet.
- Form the balls
Using a small cookie scoop or a tablespoon, portion the mixture and roll into 1-inch balls. Place them on the prepared baking sheet. If the mixture sticks to your hands, briefly chill the bowl or rub a little vegetable oil on your palms.
- Chill
Refrigerate the balls for at least 30 minutes (or freeze 10–15 minutes) until firm. This helps them keep their shape during dipping.
- Melt the coatings
Melt the white chocolate in a microwave-safe bowl in 20–30 second bursts, stirring between each interval, until smooth. Repeat with the red and blue candy melts in separate bowls. If the white chocolate is thick, stir in 1 tsp of neutral oil to thin slightly for a smoother dip.
- Dip the balls
Remove a few chilled balls from the fridge. Use a toothpick or dipping fork to lower a ball into the melted white chocolate, tapping off excess. Place back on parchment. Work quickly to avoid steaming the chocolate from warm hands.
- Decorate
While the white coating is still wet, sprinkle on red/blue/white sprinkles, or use the red and blue melts to drizzle stripes. For a classic look, dip half in white, then drizzle red and blue lines across the top once the base is set.
- Set and store
Let the dipped Oreo balls set at room temperature, or speed things up by popping the baking sheet into the fridge for 10–15 minutes. Store in an airtight container in the fridge for up to a week, or freeze for longer storage.
Tips from my kitchen
- If your white chocolate seizes, try adding a teaspoon of vegetable oil and stir; if that doesn’t fix it, start with a fresh batch—seized chocolate can be stubborn.
- Keep the balls chilled and dip just a handful at a time — overhead room temperature will soften them and make dipping messy.
- Use good-quality melting wafers if you plan to pipe thin lines; they hold shape better than thinned white chocolate.
Serving and presentation ideas
Place the Oreo balls in paper mini-cup liners on a platter, or arrange them in a mason jar for a portable party treat. They make wonderful edible place cards if you add a small sticker with guests’ names to the jar lid — simple and charming. When you want simple, reliable desserts, recipes like 4-Ingredient Peanut Butter Cookies are great to have in rotation.
FAQs
Yes, but full-fat cream cheese gives the creamiest texture and the best flavor in the center. Low-fat versions can make the mixture looser, so you may need more crumbs to firm it up.
Absolutely. You can make them and store in the fridge for up to a week, or freeze for up to 3 months. Thaw in the fridge before serving.
You can tint white candy melts with oil-based candy color, or use red and blue sprinkles to add color without extra coatings.
Conclusion
These patriotic Oreo balls are one of those easy, no-fuss recipes that makes a big impression. They’re great to make with kids (let them do the decorating), and they travel well for potlucks and picnics. If you love the idea of turning classic cookies into festive truffles, you’ll find these to be a reliable, crowd-pleasing option every time. Happy dipping — and enjoy the smiles they bring!
For another no-bake, chocolatey treat to pair with these truffles, try the Easy Fudge Recipe.
Patriotic Oreo Balls
Ingredients
Main
- 36 regular chocolate sandwich cookies Oreos or store brand
- 8 oz cream cheese , softened
- 1 tsp vanilla extract optional
- Pinch of salt optional
Coating & Decoration
- 12 oz white chocolate or white candy melts, melted
- 2 oz red candy melts or red-colored white chocolate, melted
- 2 oz blue candy melts or blue-colored white chocolate, melted
- Assorted red white & blue sprinkles
Instructions
- Crush the cookies into fine crumbs using a food processor or a zip-top bag and rolling pin. Mix the crumbs with softened cream cheese (and vanilla/salt if using) until combined into a dough.
- Scoop and roll the mixture into 1-inch balls. Place on a parchment-lined baking sheet and chill in the refrigerator for at least 30 minutes (or freeze 10–15 minutes) until firm.
- Melt white chocolate in short bursts in the microwave or over a double boiler until smooth. Melt red and blue candy melts in separate bowls. If white chocolate is too thick, stir in a teaspoon of neutral oil.
- Dip chilled balls into the white chocolate, tapping off excess. Place back on parchment and decorate with sprinkles or drizzle with red and blue melts while coating is wet. Allow to set at room temperature or refrigerate briefly.
- Store in an airtight container in the refrigerator for up to one week or freeze for up to three months. Thaw in the fridge before serving.
Notes
- If white chocolate seizes, try adding a teaspoon of vegetable oil and stir — if it remains grainy, start fresh.
- Work with a few balls at a time to keep centers chilled and prevent melting during dipping.
- Use candy melts for brighter colors and easier piping; oil-based food color is needed to tint white chocolate.